August 31, 2010

back to my roots

While I am admittedly a fan of almost all things crafty, my first love is papercrafts. More specifically, card making. This afternoon, I was able to spend some time crafting a few cards. After devoting so much of my time lately to quilting, it was fun to sit down and play with paper and ink today.

990268171_FqDNb-X3.jpg

I am a demonstrator for Stampin’ Up!, and next week I am teaching a card workshop to a group of gals I used to work with. They pay a $10 class fee to cover supplies and my time designing the card samples, and then they get to recreate each of the cards twice. At the end of the night, they have six beautifully hand-made cards – a total steal for the money. Of course, I hope they will buy a few new products as well, but it’s not a requirement.

I let the upcoming Fall holidays be my inspiration for each theme. Stampin’ Up! has lots of great products that are specific to each holiday so deciding on which products to feature was a bit of a challenge.

990268511_xsMHG-X3.jpg

There were lots of creepy and spooky stamp sets to choose from, but I just love the sweetness of the set that includes this image. The other great thing about this set is that it includes three other darling images. One for back-to-school, one for Christmas and the last one is perfect for Valentine’s Day. It’s great to be able to get a lot of use out of a set. For this particular card, I embossed the card base and cut the curvy shape piece using dies from the Big Shot. The image was stamped with Staz-On ink in Jet Black and then I hand-colored it with Stampin’ Up!’s classic inks using a blender pen. I finished it off with a wrap around of hemp twine.

990268788_VvZ7z-X3.jpg

I think this may end up being our Christmas card this year. I {love} Santas and this one us just the perfect Santa. He reminds me of the Sundblom Santa that was featured in Coca-Cola advertisements. Remember those? The card base is a color called Crumb Cake and it is a nice kraft color. I first stamped the Santa in Crumb Cake ink so I could faintly make out all the areas of the image. Then, I used a blender pen, a few classic inks and a white craft ink to color him in. Then, I re-stamped the image using Soft Suede classic ink to really make the design pop. If you are wondering how I was able to get the image exactly in the right spot the 2nd time around, I used a magically wonderful tool called a Stamp-a-majig. I burned the edges of the card front using a stiff brush and some Soft Suede ink. I finished it off, by thoroughly inking the edges of the card front (again, with Soft Suede). The sentiment was stamped in White craft ink on Riding Hood Red cardstock that had been made pliable by curling with the edge of a bone folder. I did some light edge burning on that piece as well before I adhered it to the front of the card with some dimensional adhesive. I love how this card looks like it could have been made decades ago. It’s just the look I was going for.

990269120_4MUe2-X3.jpg

Thanksgiving cards have become very popular in the last few years. One of gals requested I demonstrate a Thanksgiving card next week, and here is the prototype. I must admit, this design has been lifted off the pages of the newest Stampin’ Up! Idea Book & Catalog. I made a few minor changes in color selection, but the overall design is not mine to take credit for. The largest image is actually from a stamp wheel. It was stamped in Versamark ink. I then dusted it with clear embossing powder, which was heat set giving the image a nice glossy tone-on-tone effect. This card is really quick and easy and could be something you could make dozens for and hand out to all those you wish to show your appreciation to during the holidays.

If you would like more information about any of the products I’ve mentioned in this post, please feel free to contact me via email.

August 26, 2010

thread

983537504_ziD8N-X3.jpg

Thread. As a quilter it is a vital component to our craft. I learned early on in my quilting adventure that not all thread was created equal. All of the “Learn to Quilt” articles I read emphasized that you would use cotton thread when piecing and quilting. So, with that bit of knowledge I ran to Joann’s and picked up a couple large spools of Coats & Clark 100% Cotton Thread. I went crazy piecing things together, quilted a few projects and then I started noticing some “issues” with my machine.

I was sewing on a Singer Futura SES2000. It has a detachable embroidery unit and was my first new machine purchase in February of this year. I noticed that it wasn’t working right when I would try to do a reverse stitch. It would mostly just stitch in one place. I called the 800 number for Singer support. The lady on the phone was super helpful and asked lots of questions. When she asked me what kind of thread I was using, I proudly told her Coats & Clark 100% Cotton. Then she asked what the weight was, I looked at the spool to see it was 30 wt, which I relayed to her. Then she said, you are using the wrong thread. Oh dear.

It turns out my machine “prefers” 50 wt cotton and all-purpose thread and a 40wt polyester or rayon for embroidery. I had been using Robison-Anton Rayon thread for embroidery and they recommended their cotton for my machine. The only problem is that it’s not readily available. At least not around here. I managed to find a local quilt shop that sold a little bit of RA 50wt super cotton, but they mostly sold the 25wt, which wouldn’t work in my machine. I bought a couple mini-king spools at about $7 each and headed back home. The good news is that my machine was very happy with the change, but I was sick thinking about how much I was going to spend on thread.

On a trip to Paducah, I happened to find a couple of king spools for $12 each… a total steal. I have used a good bit of both of those and have over a dozen quilts to finish before Christmas, so I worried about where I would be able to get more. I am happy to report that I found a great source online for my favorite thread. The prices are really great and shipping is always free (can’t beat that). Plus, depending on how much you spend, they give instant coupons. I stocked up on five King spools and five mini-kings for around $85. A lot of money for just thread, but hopefully this will get me through all my projects this year and then some.

Allthreads.com sells several brands, so even if your machine doesn’t have such discriminating tastes in thread, you should be able to find what you need.

August 22, 2010

Tools of the Trade: Machingers

Since I began quilting about five months ago, I have done lots and lots of piecing, but I have only quilted about eight things. Four baby quilts and four table runners. In the beginning, I was quilting on a machine with a fairly small throat. It would be cumbersome at times, but I was able to make it work. Thankfully I had an extension table, which helped tons. While it wasn’t all that difficult to quilt, I knew there had to be a tool to make it easier.

978246908_SJv9T-X3.jpg

One tool that I discovered at a local quilt shop is Machingers. I couldn’t believe how much easier it was to quilt when I was wearing them. The biggest difference was how I felt physically when I was finished. Before, my arms and hands would be really tired when I finished a project. I didn’t realize how much of a strain I was putting on that part of my body just trying to move my quilt around. I love this product and at around $8 for a pair, they are one of the less expensive tools I use.

I love that they are form fitting, but they aren’t hot. They are easy to get on and off and they come in a variety of sizes. If you don’t own a pair for yourself, look for them at your favorite quilt shop or they are readily available online. I have found them for as low as $7.09 at Create for Less.

**Do you use gloves when you quilt?**

August 20, 2010

Portable Design Wall Tutorial

I’ve been cleaning, purging and organizing my studio to make room for all of my new quilting *stuff*. As I was sifting through the menagerie of things in the large closet, I came across an old fabric board. It is one of those accordion folded pieces of corrugated cardboard that can be used for measuring fabric. My mother-in-law had left it behind when she moved out of the house and I just stuck in the closet where it was forgotten about.

I was almost ready to put it in the cardboard recycling bin when I had a flash of genius (at least I thought so). You see, I’ve been wanting to put up a design wall for quite a while now, but haven’t really been too inclined to go pick up the lumber I thought would be necessary to frame it. I was making it overly complicated, I’m sure, but that’s just how my mind works. So on this particular day as I was feely woozy from the heat and tired from all the clean-out *stuff* I came up with a plan for how to turn that old, yellowed piece of cardboard into a design wall.

976561395_BGREo-X3.jpg

What you will need:
- Cardboard cutting board
- Felt (or other clingy material)
- Super 77 Spray Adhesive (only the strongest will do for this project)
- Fabric Scissors
- Hanging hardware of your preference

976561634_3aezf-X3.jpg

Step One: Spread your cutting board out on a flat surface, preferably OUTSIDE. I cannot stress this enough. Super 77 is M-E-S-S-Y. So unless you want everything in your house sticky and wreaking of heinous fumes, take it outside. I used my driveway.

Step Two: Spray the board liberally with adhesive. This is no time to hold back. Make sure you have even coverage as well.

Step Three: Carefully lay your felt on the board. Using firm pressure, smooth the fabric removing all wrinkles from the center outward.

976561843_z5Bfm-X3.jpg

Step Four: Once you have smoothed the felt completely, it is time to turn the board over. Using your scissors clip the corners as shown above.

Step Five: With the board still upside down, spray adhesive liberally onto the felt that is hanging over the edge, then wrap the felt around to the backside. Again, don’t skimp on the adhesive here.

976561966_be6Yv-X3.jpg

Step Six: Finally, hang your design board

The greatest advantage to this design wall is that it is portable. You can still fold it up and take it with you. Perfect for quilting retreats or when you head out for a day of sewing with a good friend.

I was able to make this entire project using items I already had on hand. The only thing I had to purchase were the hooks for the wall. Speaking of which, here is a close-up of how I am hanging mine.

976562093_p8TeU-X3.jpg

I used a curtain grommet machine to make the holes and then I inserted large metal grommets. To hang it, I purchased 3M Command hooks, which just add to the portability. Anytime I want to take this along with me, I can take the hooks as well and not have to worry about hanging it and causing damage to the walls.

One last thing to note. I noticed that the acrylic felt I used was pretty smooth, so to increase it’s cling-ability, I plan to rub it gently with a Scotch-Brite pad to make it a little more fuzzy.

Good luck making your very own Portable Design Wall. If you make one, please let me know, I would love to see how everyone else makes use of this tutorial.

Happy Crafting!!

Edited to add: There are several ways to hang this, so don't think that if you don't have a big grommet setting machine you can't make this work. Binder clips would make for a cute, industrial look. A few skirt hangers that have the pinch clips would give it a home-spun flavor. Make holes with a larger craft needle and string a fine gauge wire through the holes... there are lots of possibilities if you just use your imagination. Have fun!

August 16, 2010

pure heaven

pure_fat_quarter_bundle.jpg

There’s a new fabric line hitting quilt shops in the coming weeks. PURE by Sweetwater for Moda is absolutely perfect. I have been waiting (rather impatiently) for this line for a few months now. So imagine my delight when I read that Julie at jaybird quilts is hosting a giveaway of a PURE FQ bundle sponsored by the fab folks at The Fat Quarter Shop. There are five chances to enter, and you can get all the details by clicking here.

August 14, 2010

oh happy day

My very first new sewing machine arrived this past February. It is a wonderful machine and I have gotten many hours of enjoyment out of it. It does sewing and embroidery, and when I bought it I thought I got the deal of the century. I found it at costco.com for only $600, while it was retailing on HSN for anywhere from $1200-$1500. Thus far, I have done all my piecing and quilting with this machine, but it does have it’s limitations due to a small throat size.

A few months ago, I happened to catch a “Singer Hour” on HSN where they were featuring the Quantum L-500. It was like angels from heaven had carried this machine to earth to give me all I ever wanted in a machine. It was $1200 and so I cried. After losing my job last October I have really had to change my shopping habits. A year ago, I would have bought it on the spot. Flash forward a year and I figured the closest I would get to this machine was watching the HSN video on YouTube.

Every week or so, I venture over to craigslist to see what kind of machines they have. Imagine my surprise to see a listing for the machine I had longed for, for so many months. It was fate! The asking price was $900… totally out of my price range. Even though the listing said the machine was brand new, never out of the box, I honed in on two little words in the listing… MUST SELL. So, I quickly responded asking if they would accept $500. Then I started having heart palpitations.

The seller responded very quickly with a counter-offer of $600, which is a stretch, but too good to pass up. It turns out, the seller was a cute girl who just graduated with a fashion degree and she received this machine as a “prize” for winning a competition at school. She had three other machines and needed some cash to help her get out of mom and dad’s house. A win-win for both of us, and it made Friday the 13th a great day for me. One I won’t soon forget.

Here she is fresh out of the box. No name for her… yet!

http://stefanie-and-richwilliams.smugmug.com/photos/969225766_QFjZk-M.jpg

August 12, 2010

New Look

I've had the hardest time getting Blogger to cooperate with me. It shouldn't be this complicated to get a post written and published to my blog, but for some reason, I have the hardest time. I just published a post I had started a few weeks ago. Am I the only person who finds the blogger photo upload/insertion process dumb? Why won't it put the photo where I want it? Does anybody really want all their photos crammed at the top of the post? If someone has any advice, please share, because there HAS to be an easier way!!

A blogging friend of mine recently told me that she sends her posts via email, so I tried it tonight. Although I did have to go in and relink my images, it is definitely quicker than trying to do the whole thing in blogger. Maybe I can start posting with some regularity now. According to my friend, Royce, my life is interesting enough to blog about, so we'll see.

Tonight I noticed there is a new template designer function and that's where I found this new template. Not much different than the plain white I had before, but I do like the shading on this new one. It adds a little something, something. My favorite feature, was the ability to adjust the width of my blog and the sidebar. It's the little things in life, you know?!?!

I hope to be back tomorrow with another installment of my Tools of the Trade series. I have so many great products to talk about.

Seeing Double

967887813_AvSbh-M.jpg

I recently finished up a few quilting projects that were twins. The first set was a simple table runner pattern I discovered on Moda Bake Shop. I knew it would be a great quick and easy project for the new 12 Days of Christmas fabric by Kate Spain for Moda. And because it was so simple, I decided to make two. One for me and one to give to my Mother.

967887999_hryX8-M.jpg

I had pieced the tops about four months ago, but had to wait until I could get some yardage to finish up the project. I quilted with a simple meandering and now they are ready to dress up a table for the holiday season.

967888144_LX7MC-M.jpg

967888344_HiMp4-M.jpg

For the next set of quilts, we know two young ladies who graduated from High School this year and I thought lap quilts would be the perfect gift for both of them. I had purchased fabric from the Hunky Dory line by Chez Moi for Moda Fabrics with the intention of making a framed charm square quilt but I really didn’t know who would be the recipient of said quilt. When we received the graduation announcements in the mail, I knew I wanted to make something for them, and then it hit me, that this would be the perfect use for Hunky Dory.

967888559_z5dVh-M.jpg

967888704_vHBLc-M.jpg

This collection is so young and fresh I decided that would be perfect for these girls embarking on an exciting new chapter in their lives. I followed my original plan for the framed charm blocks and couldn't be more pleased with the end result. I quilted both with a simple meandering pattern. I’ve sent them away to their new ownders who I am sure will enjoy them for years to come. They finished out at about 48" square. I still have enough jelly roll strips and charm squares to maybe make a little something for myself. For now, the leftovers can chill out in my stash drawer as I have so many other projects on deck.

July 22, 2010

have you missed me?

I really suck at blogging. If I were a quitter, I would totally stop trying. I want to be one of those people who posts something every day, but I have a hard time believing that my life is interesting enough to document so religiously. I have had a lot going on since I last posted, so here are all the highlights in a handy, time-saving bullet point list.

  • I've pieced twelve tops. Mostly lap quilts, but a few table runners as well.
  • Spent four fun days with my mom and a college friend for a girls weekend in April.
  • Took my quilting buddy Royce up to my folk's place for a quilting retreat and shopping at Hancocks of Paducah.
  • Fell in love with a few new quilting tools.
  • Have had several fun and creative days with Royce working on projects.

What have you been doing?

April 15, 2010

i {heart} burgundy buttons

Aside from loving crafts, I really love craft supplies. Because I am afflicted with the *need* to purchase every imaginable gadget for my crafts of preference, it's really important that I get my supplies at the best price possible.

My latest craft obsession (yes, obsession) is quilting. With that, came the need for all sorts of new tools and gadgets and lots and lots of fabric. The first project I planned was a lovely table runner that would require a charm pack from the Verna by Kate Spain collection for Moda Fabrics.

In my quest to find something locally, I stumbled across Burgundy Buttons. The owner, Leah, lives and works in my neck of the woods. As an Internet merchant myself, I wanted to support her business. At the time, I was so new to things, I didnt' realize just what a great deal her prices are. That is no longer the case. Her prices are without a doubt, the lowest I've found and her level of service is outstanding.

If you haven't experienced Burgundy Buttons for yourself, you really should check it out. Be sure to head over to her blog as well because she is hosting an incredible giveaway and offering a great sale on her already unbeatable prices.

April 13, 2010

verna's cutting garden: complete


This particular project was the catalyst.

It drove me over the edge in more ways than one.

I spent a fun day at Royce's house several weeks ago. Up to that point, quilting had always been one of those things I wanted to try, but hadn't taken the plunge. After a few hours of looking at her stash of fabrics and leafing through some quilting magazines, I was becoming more and more interested.

Then, she introduced me to the Moda Bake Shop. Be still my heart. Lots of cute projects that were super easy. I was immediately drawn to the Verna's Cutting Garden table runner. With Mother's Day approaching I thought this would be a nice project. From that moment I have gone crazy buying supplies and lots and lots of beautiful fabrics.

Last night and several nervous breakdowns later, I finished it. I had purposely waited a few weeks to quilt this until my extension table arrived and I'm glad I did. Although there were many many mistakes made throughout the process, I love this and I look forward to seeing it grace my Mother's table for many, many years.

April 06, 2010

Tools of the Trade: Accuquilt Go!

This post is the first in a new series I have entitled Tools of the Trade. My initial thought was to keep this series quilting related. Since I have such a broad spectrum of interests in the crafting world, I will be highlighting my favorite tools regardless of craft. I hope that regardless of your level of skill that you will find the information informative. Please share your comments - we can all learn from each other!No matter what your craft of preference, it is my firm belief that if you are going to participate, it is important to have the right tools. For this first post, I will be highlighting the Accuquilt Go! Fabric Cutter. I have no doubt there are experienced quilters who may question why I would choose to blog about this first as opposed to a basic supply like the rotary cutter... you may be one of them. So please stick around, grab your favorite beverage and read on.


In my opinion, accurate cutting is to quilting, what good footers and a foundation are to home building. If you don't get it just right, it will be hard on the pocketbook and hard on your emotional well-being.

Soon after I fell prey to the lure of quilting, I realized that all. that. cutting. was going to be an issue for me. Even though I am fairly accurate, the idea of spending immense amounts of time cutting fabric was not appealing. I am impatient. I want to get to the fun part faster! I have enjoyed the ease of die-cutting in the world of paper crafts for several years, so I really hoped there was an equally brilliant product made especially for fabrics.

While the price tag for the machine is high (MSRP is $349), I instantly felt that it would be a wise investment. Never one to pay full retail price, I searched the Internet until I found a retailer who has figured out a way to offer this item and the dies & accessories for a much lower price. It also helps to have a quilting buddy to share with. My friend Royce has purchased some dies and so have I. We share them and that eases the strain on the crafting budget.

I recently designed a custom quilt for my mother in law, the center panel is comprised of 5" charm squares. I literally cut all of the squares for this quilt in less than 10 minutes. With the strip dies, I can cut my binding strips for the entire quilt in about 2 minutes... and they are perfectly straight!

The Go! cutter won't eliminate the need for other cutting tools, but it does lessen the number of manual cuts significantly. The accuracy and time savings are what keeps me going back to this tool time and time again, and why I believe this is a tool every quilter (or quilting group) should have in their tool bag.

Edited to add: I have recently joined forces with a group of accuquilt bloggers organized by SewCalGal. By following this link, you will have access to dozens of other blog posts related to the Accuquilt Go! Cutting System.

March 31, 2010

Custom Quilt Update

I've had to take a short break from sewing for a few days, so I thought I would post a quick update on one of the custom quilts I have been working on. I apologize for the poor quality photo. I snapped this quickly with my iPhone since my real camera wasn't handy.


This is one of the many quilts I will be giving to members of our immediate family for Christmas this year. I designed this quilt to use mostly charm squares. I have purchased a Go! Cutter (more on this in a separate post) and the charm square die and wanted to be sure to make use of it.

Because of the simplicity of the design, this pieced together very quickly, even though I made some critical errors (see this post). It took about a day to fully complete the topper, including the applique. I have one more custom quilt to cut, piece and applique. It is also a very simple design and will utilize Go! dies, which is a huge timesaver.

March 27, 2010

learning the hard way

I'm new to quilting. Did you know that? I am also a "figure things out as a go" kind of person. That kind of thought process is a little dangerous when it comes to quilting.

Last night I was ready to sew the rows together on a custom designed quilt. I have been sewing for over 20 years off and on, so I was mostly concerned with the length of the rows matching up and getting that darn 1/4" seam allowance right. When it was all pieced together, i noticed my blocks weren't matching up with each other very well. That didn't sit to well with my perfectionist personality.

I spent some time with my seam ripper and pretty much had to take all the rows apart and this time, when i pinned it together, i also made certain to match up the blocks. The result... beautiful. I will try to post some pics in my next post.

Have a terrific day!

PS - If you are reading this on March 27, 2010 hop on over to my favorite online fabric shop and buy a few things from Leah at Burgundy Buttons. Her prices are A.M.A.Z.I.N.G. and today only, she's having a fun sale. Just use coupon code: bright and save an additional 10%!!

March 25, 2010

there's a first time for everything

I decided earlier this year that I would only give hand-made gifts this year. This will hopefully save some money and provide a good excuse to work on crafty stuff. I have really taken a liking to quilting. The fabrics available these days are just incredible. I love color & pattern, so it's been lots of fun exploring this new-to-me craft.

Between my family and my husband's family, I have lots of folks to make gifts for. The idea is do make a smaller something for birthdays & mothers/fathers day and a bigger something for Christmas. The challenge with this is that because my business gets crazy busy around mid-October, I will need to have most of my gifts complete by then, which requires lots of planning ahead.

When I started thinking about what to make for my father and my mother in law, I knew I wanted to make each of them a nice snuggly themed quilt. For these, I was not going to find a handy pattern online. No, I was going to have to jump out there and create my first patterns. I found the whole process fairly simple. I had a vision for what I wanted the end result to look like, and just translated that into blocks/strips to achieve the look I was going for.


This quilt for my father will finish out at 48" x 72".


This quilt for my mother in law will finish at 60" x 60"


March 20, 2010

jumping in!


I love crafts. Did you know that about me? I have a pretty wide variety of interests... let's just say I shop in several departments in the craft store. One particular craft has been on my 'want to try' list for a few years, Quilting.

I got a new sewing machine recently and that has really fueled my interest in fabric arts. After I finished monogramming every towel and Vera Bradley bag I own, I decided it was time to conquer quilting. I turned to my good friend, Royce, for guidance.

I've known Royce for several years. She (yes, SHE) and I worked together before she got smart and left her job to do freelance work and spend more time making beautiful things. Anyway, she started quilting a few years ago, about the time she learned how to thread a sewing machine needle and has been encouraging me along this journey.

I intended my first project to be a cute little thing for my Mom. Before I could get started on that, I found a pattern for a quilted ironing board cover. I have been in desperate need of a new cover for so long and that fact became glaringly obvious as I was pressing fabric to be cut for my other project.


I re-prioritized my projects and now I have a super cute, but not-quite perfect cover for my ironing board. I'm happy with the results and motivated to start my next project.
Fabric used in this project: Frolic by Sandy Gervais Moda Jelly Roll
Special thanks to my new fave online fabric shop... Burgundy Buttons for the great prices and customer service.

let's try this again, shall we?

When I originally started this blog, I had intended it to focus primarily on my crafty endeavors. At the time, I was a newlywed working full-time in corporate America, starting a new business and renovating a 30-year old condo. That sentence alone should tell you that I didn't have time for crafty endeavors. So, my blog became more about nothing and what I had started with high hopes and aspirations just turned into something else to keep me from getting my craft on.

So, what's changed? Well, quite a bit, actually. I'm creeping up to my fifth wedding anniversary, I left corporate America behind to focus on my growing business, sold our beautifully renovated condo and now in the throes of renovating a 30-year old house. I finally have time and energy to get my craft on again!

Whether you are an old reader or new reader, Welcome! I'll try to do better this time around.

July 07, 2008

Quick Update

It's been a while since I've posted. Like all blog breaks, I never intend to take a break, it just sort of happens. So, before this turns into a slump, I thought I should at least post a line or two.

Summer is off to a good start. Things have been busy lately. Business is booming and it's such a great feeling to see this dream of mine continue to grow and evolve. It's shaping up to be a banner year and that really excites me.

I throroughly enjoyed the long holiday weekend. For the first time in a long time, I didn't have any obligations on the calendar! It was such a rare treat to just make up the schedule as it went along. I spent two blissful afternoons at the pool on Thursday and Saturday. Did lots of reading and Sunday, I took a nap IN THE MIDDLE OF THE DAY! I never do that unless I'm sick, so this was such an indulgence for me.

Rich and I were both off on Friday and had a fun day of hanging around the house while I cooked up a traditional Independence Day feast of barbeque ribs, potato salad, chilled broccoli salad, baked beans and cornbread. Then for dessert, we made sundaes out of my Island Inspiration brownies. We had his mom over for dinner and to watch the first inning of the Cubs/Cardinals game. It was a great day!

How was your 4th?

June 21, 2008

Color Inspiration Challenge #12

I had a little more time to think about this challenge than last week. I'm not actually sure how the colors were picked, on my monitor I'm just picking up a chocolatey brown and white, but I was able to pull this palette together into a cute little pocket card.


What do you think?


June 16, 2008

Today's Faves


Food: Thyme Grilled Chicken with Maple Chipotle Glaze
Drink: McD's Sweet Tea
Fruit: Sweet strawberries

Ice cream: Graeter's Coconut Chip
Candy bar: Mounds
Music: Lady Antebellum
TV Show: Jon & Kate + 8
Movie: Sex and the City
Book: Love the One You're With - Emily Giffin
Sound: The peaceful splashing sound of my float moving through the water.

Smell: Coppertone continuous spray sunscreen.

Sight: The latest release from Papertrey Ink
Touch: Floating in the cool water of the swimming pool on these hot days
Taste: Coconut-Walnut Brownies (oh, my)

Riding in Cars with Dogs

This boy would love nothing more than to spend all of his days riding in cars. In the days when it was just the two of us, we took many drives together, but these days, not so much. Over the weekend I made a quick overnight trip to visit my parents and took Riley along for the ride. He loved every minute of the ride there and back (3 hours each way).

I snapped this shot of him while I was driving yesterday. (Don't freak, I just held the camera with one hand and kept snapping away - this was the only picture out of many that was usable.) It perfectly captures his fantastic personality and his love for the open road. I loved having him with me and it reminded me that I need to bring him along for the ride more often.

June 13, 2008

Color Inspiration Challenge 11

It's time again for the kwernerdesign blog Color Inspiration Challenge. The palette and inspiration shown above is brought to us by Ikea. Read on to see my entry and to read a little bit behind the design.


I really liked the palette for this week's challenge. It was much easier for me than the previous challenge. As Kristina pointed out when she posted the challenge, the inspiration uses a great deal of white. I love working with white as much as I like working with color. In terms of impactful design, white, when used with limited amounts of bold color can really provide an incredible result.

This card is very simple, but I think that's what is most striking about it. I love the layers of petals, the dimension of the flower, the texture of the piercings really pop. This challenge was great fun. Hope you enjoy!!

Cardstock: So Saffron, Stampin' Up; White Opaque, Cougar
Inks: Rose Red, Old Olive, Craft White: Stampin' Up
Stamps: Friendship Blooms, Lots of Dots Jumbo Wheel: Stampin' Up
Tools: 1" & 3/4" circle punches: EK Success; Mat Pack: Stampin'Up; Stampin' Dimensionals: Stampin' Up

June 09, 2008

Haves & Have Nots

This looked like a fun activity. I've seen this on several blogs over the last few days and decided I would play along.

1. Touched an iceberg
2. Slept under the stars
3. Been a part of a hockey fight
4. Changed a baby's diaper
5. Watched a meteor shower
6. Given more than you can afford to charity
7. Swam with wild dolphins
8. Climbed a mountain
9. Held a tarantula (and not bloody likely too, either!)
10. Said "I love you" and meant it
11. Bungee jumped
12. Visited Paris (Tennessee, that is)
13. Watched a lightning storm at sea
14. Stayed up all night long and watched the sun rise
15. Seen the Northern Lights
16. Gone to a huge sports game
17. Walked the stairs to the top of the Statue of Liberty
18. Grown and eaten your own vegetables
19. Looked up at the night sky through a telescope
20. Had an uncontrollable giggling fit at the worst possible moment
21. Had a pillow fight
22. Bet on a winning horse (by accident, but still...)
23. Taken a sick day when you're not ill
24. Built a snow fort
25. Held a lamb
26. Gone skinny dipping
27. Taken an ice cold bath
28. Had a meaningful conversation with a beggar
29. Seen a total eclipse
30. Ridden a roller coaster
31. Hit a home run
32. Danced like a fool and not cared who was looking
33. Adopted an accent for fun
34. Visited the birthplace of your ancestors
35. Felt very happy about your life, even for just a moment
36. Loved your job 90% of the time
37. Had enough money to be truly satisfied
38. Watched wild whales
39. Gone rock climbing
40. Gone on a midnight walk on the beach
41. Gone sky diving
42. Visited Ireland
43. Ever bought a stranger a meal at a restaurant
44. Visited India
45. Bench-pressed your own weight
46. Milked a cow
47. Alphabetized your personal files
48. Ever worn a superhero costume
49. Sung karaoke
50. Lounged around in bed all day
51. Gone scuba diving
52. Kissed in the rain
53. Played in the mud
54. Gone to a drive-in theater
55. Done something you should regret, but don't
56. Visited the Great Wall of China
57. Started a business
58. Taken a martial arts class
59. Been in a movie
60. Gone without food for 3 days
61. Made cookies from scratch
62. Won first prize in a costume contest
63. Got flowers for no reason
64. Been in a combat zone
65. Spoken more than one language fluently
66. Gotten into a fight while attempting to defend someone
67. Bounced a check
68. Read - and understood - your credit report
69. Recently bought and played with a favorite childhood toy

70. Found out something significant that your ancestors did
71. Called or written your Congress person
72. Picked up and moved to another city to just start over
73. Walked the Golden Gate Bridge
74. Helped an animal give birth
75. Been fired or laid off from a job
76. Won money
77. Broken a bone
78. Ridden a motorcycle
79. Driven any land vehicle at a speed of greater than 100 mph
80. Hiked to the bottom of the Grand Canyon
81. Slept through an entire flight: takeoff, flight, and landing Nyquil helps)
82. Taken a canoe trip that lasted more than 2 days
83. Eaten sushi
84. Had your picture in the newspaper
85. Read The Bible cover to cover
86. Changed someone's mind about something you care deeply about
87. Gotten someone fired for their actions
88. Gone back to school
89. Changed your name
90. Caught a fly in the air with your bare hands
91. Eaten fried green tomatoes
92. Read The Iliad
93. Taught yourself an art from scratch
94. Killed and prepared an animal for eating
95. Apologized to someone years after inflicting the hurt
96. Communicated with someone without sharing a common spoken language
97. Been elected to public office
98. Thought to yourself that you're living your dream
99. Had to put someone you love into hospice care
100. Sold your own artwork to someone who didn't know you
101. Had a booth at a street fair
102. Dyed your hair

103. Been a DJ
104. Rocked a baby to sleep
105. Ever dropped a cat from a high place to see if it really lands on all four
106. Raked your carpet
107. Brought out the best in people
108. Brought out the worst in people
109. Worn a mood ring
110. Ridden a horse
111. Carved an animal from a piece of wood or bar of soap
112. Cooked a dish where four people asked for the recipe
113. Buried a child
114. Gone to a Broadway (or equivalent to your country) play
115. Been inside the pyramids
116. Shot a basketball into a basket
117. Danced at a disco
118. Played in a band
119. Shot a bird (if this can include the one found on both my hands he he)
120. Gone to an arboretum
121. Tutored someone
122. Ridden a train
123. Brought an old fad back into style
124. Eaten caviar
125. Let a salesman talk you into something you didn’t need
126. Ridden a giraffe or elephant
127. Published a book
128. Pieced a quilt
129. Lived in an historic place
130. Acted in a play or performed on a stage
131. Asked for a raise
132. Made a hole-in-one
133. Gone deep sea fishing
134. Gone roller skating
135. Run a marathon
136. Learned to surf
137. Invented something
138. Flown first class
139. Spent the night in a 5-star luxury suite
140. Flown in a helicopter
141. Visited Africa
142. Sang a solo
143. Gone spelunking
144. Learned how to take a compliment
145. Written a love-story
146. Seen Michelangelo’s David
147. Had your portrait painted
148. Written a fan letter
149. Spent the night in something haunted
150. Owned a St. Bernard or Great Dane
151. Ran away
152. Learned to juggle
153. Been a boss
154. Sat on a jury
155. Lied about your weight
156. Gone on a diet
157. Found an arrowhead or a gold nugget
158. Written a poem
159. Carried your lunch in a lunchbox. (Holly Hobbie!!)
160. Gotten food poisoning
161. Gone on a service, humanitarian or religious mission
162. Hiked the Grand Canyon
163. Sat on a park bench and fed the ducks
164. Gone to the opera
165. Gotten a letter from someone famous
166. Worn knickers (i hate that i have to admit to this)
167. Ridden in a limousine
168. Attended the Olympics
169. Can hula or waltz
170. Read a half dozen Nancy Drew or Hardy Boys books
171. Been stuck in an elevator
172. Had a revelatory dream
173. Thought you might crash in an airplane
174. Had a song dedicated to you on the radio or at a concert
175. Saved someone’s life
176. Eaten raw whale
177. Know how to tat, smock or do needlepoint
178. Laughed till your side hurt
179. Straddled the equator
180. Taken a photograph of something other than people that is worth framing
181. Gone to a Shakespeare Festival
182. Sent a message in a bottle
183. Spent the night in a hostel
184. Been a cashier
185. Seen Old Faithful geyser erupt
186. Joined a union
187. Donated blood or plasma
188. Built a campfire
189. Kept a blog
190. Had hives
191. Worn custom made shoes or boots
192. Made a PowerPoint presentation
193. Taken a Hunter’s Safety Course
194. Served at a soup kitchen
195. Conquered the Rubik’s cube
196. Know CPR
197. Ridden in or owned a convertible
198. Found a long lost friend
199. Helped solve a crime
200. Responded to a NJP newsletter

Photo Mosaic

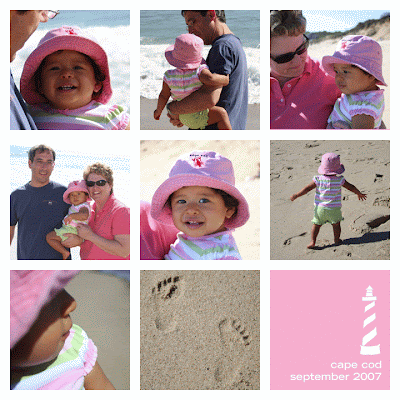
Back in February, a few of my scrapbooking friends introduced me to photo mosaics. It is form of scrapbooking, where you cut photos up in to small squares and adhere them to a piece of 12 x 12 paper to form a grid pattern.

I was intrigued by this concept, but to be honest, not excited about the prospect of cutting photos into little squares. So, when Marc posted the TOP challenge for this month, a light went off in my head. So, using some of the photos I used for my initial grid, I have created a photo mosaic.

Now that it's all together, I definitely would choose other photos next time. It's helpful if your photos have similar background. I will try this again to see if I can achieve the look I am going for, but thought I would at least post this to see if it might inspire anyone else to do the same.

Please email me if you would like instructions on how to do this.

No Show and Tell

Rich and I returned from a great weekend trip to Memphis last night and I have nothing to show. Believe it or not, I didn't take a single photo. So if you want to know what we did for three days, you'll just have to read on :-)

We got ourselves packed and the boys loaded in the car to leave the house at 8:30. Dropped the boys off at the kennel and headed west. We got about 45 minutes down the I-40, only to realize that I had left my corporate card at home. (*&^*)&%(*!!! Although this trip was mostly pleasure, it was a business trip and I needed my corporate card, so back to the house we went.

We finally arrived in Memphis about 2:30, and headed straight for the tournament. It was SO HOT this weekend. Holy moly... these are August temps! Luckily we had passes for the cabana (thank you FedEx) on the 18th green, so we were able to sit in the air conditioned comfort and enjoy some great food and cold beverages.

We left there and checked into our room at the world famous Peabody Hotel. After a brief rest, we changed and headed across the street to The Rendezvous for some of that great Memphis Barbeque. From there, it was back to the hotel, where we grabbed dessert and went back to the room.

Rich had to leave around 6:15 Saturday morning to go play golf, so I lounged around for the morning and then headed off to Archiver's. I had been looking forward to shopping there for the past month. Oh my goodness... all sorts of fantastic goodies to bring home. After the very intense shopping, I headed back to the hotel to meet up with Rich. He was tired from his golf game, and wanted to rest for a while before heading out to dinner.

We chose to eat at Cayenne Moon, cajun restaurant just a few blocks from our hotel. The food was incredible! We both love cajun/creole cooking, so this was a great treat and got me looking forward to my upcoming trip to New Orleans in September (Natasha, I'll be emailing you about a get together!).

We finished off the night with Indiana Jones. What a strange movie...

The tournament was calling our name, so we headed back over for a while Sunday morning before we started on our way home. But, not before one more stop at Archiver's... it's probably a good thing we don't have one here in Nashville. I would be broke, for sure!

On our way home, we stopped in Jackson, TN to have lunch at The Old Country Store. Oh my goodness! I am not a buffet kind of girl. I typically refer to it as fondled food. But, this place is so good. Lots of great country cooking, so I am willing to look past the fact that it is served on a buffet. I ate way more than I should have, but I made up for it by skipping dinner.

It was a wonderful trip and so great to get away, but sleeping in my own bed last night was heavenly.

How was your weekend?
What's up with the heat?

June 06, 2008

Birdies, Blues and Barbeque

Rich and I are heading off for a fun weekend in Memphis in about an hour or so. We're going for the St. Jude Classic PGA Tour event, but are looking forward to hearing some of the great music on Beale Street and a tasty dinner tonight at The Rendezvous.

This will be my first trip in many years without a computer... I'm a little apprehensive about leaving it behind, but I just feel like I need to get away. Besides, it's not like I don't have a full browser and email on my iPhone, so I won't be completely shut out. I haven't told Rich that I am doing this yet, he will be COMPLETELY shocked.

Have a great weekend, ya'll!

June 04, 2008

Let's Polka


This card is for my latest card swap over at splitcoaststampers. If you are a scrapbooking or card making enthusiast, you should check out that website. There is great information available in the forums. That's where you can sign up for swaps like this one. The gallery is also a great place to go for a little inspiration. Lots of gorgeous eye candy!

The theme for this swap was Let's Polka. The only requirement was that we were to use polka dots somewhere on the card. I created this layout in February, and loved it so much I thought I would make a few tweaks and use it for this swap. It's a very fun little card and the sentiment makes it perfect for just about any occasion... or no occasion at all.

Cardstock: Soft Sky, Stampin' Up; White Opaque, Cougar
Inks: Soft Sky, Ruby Red, Chocolate Chip: Stampin' Up
Stamps: Polka Dot Background, Make It Count, Polka Dot Posies: Stampin' Up
Ribbon: Fern Gingham, Offray

I made it!


So very excited this morning to learn that my father's day card was selected as one of the Top Ten submitted for kwernerdesign's Color Inspiration Challenge 10. I really struggled with this color combo, so just finishing was an accomplishment.

June 03, 2008

Take Out Photo - June Challenge: The Grid

My blogging friend, Michelle's husband just started a new blog. He's an amazing photographer and is sharing some of his genius tips and tricks. This month, the challenge/tutorial was how to create a grid of photos using Photoshop or Photoshop Elements.

Creating the grid and following that pattern wasn't much of a challenge for me. Although, I will say the graphic designer in me, just wanted to bypass this step in Photoshop and just lay it out in InDesign. I am not a pro at Photoshop... I can find my way around to do some very basic stuff, but Illustrator and InDesign are definitely where my strengths lie. But, I did learn some cool tricks in Photoshop that I am quite excited about. Thanks Marc for the tips and for hosting this awesome challenge. Looking forward to learning more from you!

Here is the result of my efforts. What do you think?


June 01, 2008

Color Inspiration Challenge #10


This is the first time I've been able to participate in these challenges. Normally, these run during the week, when I don't have time to sit and think about how to make a design work with a specific color palette.


Since we were working with more masculine colors, I wanted to craft a card to give to my Dad for Father's Day. I learned some things in the process of making this. I don't have many stamps that are appropriate for a card for the male gender. I don't like working with a blue/green/yellow color scheme. And most importantly, never loan your stamp pads out! I let my friend borrow these colors because 'I dont' ever work with these colors'. Thank goodness I have all the markers!


Given these 'challenges', I am pleased with the results. The numerals are a perfect choice for this card. My Father was a mathemeatics instructor, so this will have extra special meaning for him.

May 30, 2008


Looking for something crafty to do this weekend? Why not participate in the kwerenerdesign Color Challenge? Head on over to her blog for all the deets, or if you're not interested in playing along, you can always just skim through all the great eye candy.

Lost in Ribbons

A few months ago, I stumbled onto the a blog post by Nichole Heady with Papertrey Ink. She posted photos and information about her new home studio. To my delight, she posted lots of specifics, which is going to make it so much easier for me to use many of her ideas for my space as well.

So far, I've taken two steps in this process. I've purchased the white photo storage boxes (thank you 1/2 price sale at Joann's). Yesterday I began the tedious, task of organizing my ribbon. ALL. MY. RIBBON. Between my shopaholic tendencies and Kristi's generosity, I have more ribbon than I know what to do with.

To get it organized, Nichole recommends wrapping it around old-fashioned clothespins, sorting by color family and storing in great glass candy jars. Here's a photo of how she displays/stores it in her studio. It's so pleasing to the eye, and the best part is that you always know what you have and it takes up much less space than spools.


Last night, I sat down on the couch with a grocery bag full of loose ribbon, 60 clothespins and a box of straight pins and got to work. I like having mindless work to do while I"m watching TV. I thoroughly enjoyed the season finale of LOST and filled up all of the clothespins I had. Still lots more ribbon to convert, but I'm very excited about the progress.

May 29, 2008

It's been four long years


I've been waiting for this for four years. The return of Sex and the City. I lived for my summers with Carrie, Samantha, Charlotte and Miranda. It was a big part of my single-girl life. I loved hosting season premiere and finale parties each year for my girlfriends. It was always so much fun!

I've got tickets for 7:30 tomorrow night (gotta love Fandango) and I can't wait. Meeting Lisa for dinner and then we're off to the theater to get caught up on the lives of the fab four in Manhattan.

May 13, 2008

SPT: Something New

OK - So I know I am breaking the rules here... Lelly, please forgive me, as there is no S to go along with the PT. But, there is something new that I am beyond excited to share.


I've listened to this song, like 100 times already (I was able to download it last week) and I can't wait for the entire album to be released.

For those of you who are fortunate to live close to NYC, don't forget these guys will be performing live on Rockefeller Plaza on Friday morning for the Today Show.

How Rude!

I've been contemplating this post for a few weeks now. The rudeness of *some* people just astonishes me sometimes. When I first started thinking about this post, I was hesitant to put it out there, because I don't want to give my customers the wrong idea. 99.9999% of my customers are incredible. It's the .0001% that send me over the edge.

I just don't understand how people can be so nasty. Do people just feel like the internet and email give them license to be a jerk? So, I throw this out here into the blogosphere hoping that my great blogging friends can help validate my feelings - or tell me I'm out of line (either way, I just needs some perspective).

Scenario #1:
I received an email reply to a promotional email. This person took the opportunity to express that they were completely dissatisfied with my company, that it takes too long to get product, there is no order confirmation and that if I'm not going to respond to emails, don't post my address on my website. WELL... this bothered me. A LOT. So I spent a considerable amount of time to write a response. I had never received an email from this person before, she selected the slowest delivery method offered by the USPS and her spam filter may have blocked the confirmation email. Her email was very harsh, and I could understand somewhat because she had been sending emails about her order (to the wrong address), but she never apologized for her hurtful comments. I'm a big girl, I can take criticism, when it is warranted, but I do take offense to someone making mean-spirited comments and not following up with an "I'm sorry" when they realize they had made a mistake.

Scenario #2 (has happened on a couple of occasions):
A customer ordered a product, received it and emailed to say there was a printing error and DEMANDED a replacement be sent immediately. Granted, I make mistakes - more often than I like, and on those occasions, I always get a replacement out quickly. But, in this situation, it was the customers who made the spelling errors, not me. So I email them back apologizing that it isn't right, but that it was printed as specified in the order and that if they wish to have it re-printed, they would need to place another order online. On every occasion... no response. Maybe I'm over-reacting, but I would at least expect a quick - I can't believe I made such a mistake. Is that too much to ask?

What finally prompted me to post about this is all the hub-bub going on over at creativity, musings and such. I just don't think people realize how powerful their words can be... in good ways and bad. It is okay to have differences of opinion, in fact it's good to have differences of opinion. It's okay to share those differences... but not in ways that are hurtful to someone else.

It just seems to me that in this electronic medium, *some people* tend to make hurtful comments that they would never make to someones face. The anonymity of the web allows us all to be a bit more open than maybe we would normally be with relative strangers, but that shouldn't give anyone the "courage (read: cowardice)" to lash out with venomous words.

The rules of common courtesy and mannerly behavior should be followed in every situation. I don't think there is ever a valid excuse for being rude or disrespectful. There is ALWAYS a better way to get your point across.

Thoughts?